
What you need:::
Working knowledge of PSP.
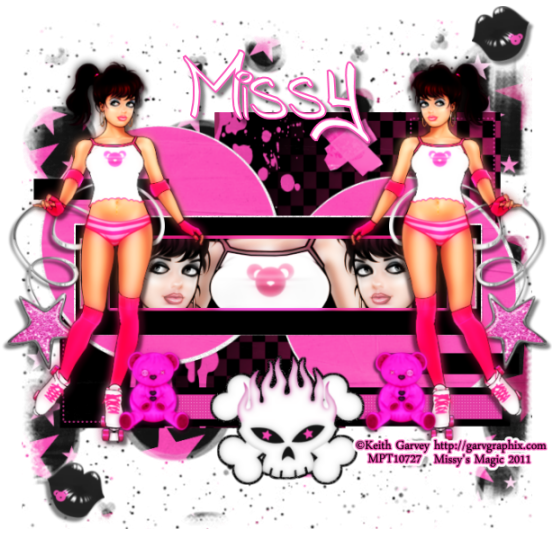
I used a tube by Keith Garvey at MPT, However, he is switching over to PSP Tubes Emporium . You MUST have a license to use his art!
The template used was Missy's Template 390 from a Divine Intentionz. Leave some love if you download!
The kit is Pink Skater from Toxic Desires. You can purchase it from one of the stores she sells at!
Mask used was WSL_206. Please leave love if you download!
Font used was chicago hood by dafont.com
Make sure to save often!
Design:::
Hide shape1, shape 2
highlight circle left
select all, float, defloat, paste paper3, invert, delete select none
repeat for circle right
delete original layers
highlight rectangle
select all, float, defloat, paste paper12, invert, delete, select none
repeat for rectangle2
go to top and paste paper16
use mask WSL206
merge group and drop to lowest layer
highlight rectangle (top layers)
select all, float, defloat, paste closeup tube, leave just face to show, invert, delete, paste closeup of body, put layer below face, delete, select none. duplicate face, mirror, merge all down to one
duplicate, adjust, gaussian blur, 2, use overlay blend on duplicate layer, luminace legacy blend for original layer
hide wordart, wordart back and wordart back2
paste tube and position as desired or see my tag for referance. Duplicate and mirror
(dropshadow as desired)
Now comes the fun- the elements!
Choose what you like, however, to match my tag, this is what I used (and resized)::
doodle1- 50% (duplicate & mirror)
teddy bear - 40% & 60% (duplicate & mirror)
lips2 - 60% (duplicate, mirror, place)
skull1 - 60% (select all, float, defloat, new raster layer, selections, modify expand 3, color, add noise, drop down under skull, select none, merge)
tape - 30%
Don't forget to add your name and your copyright! Hide background, merge visible, resize if desired and save as a jpg or a png.
This tutorial was written on February 5, 2011.
No comments:
Post a Comment