Sunday, March 13, 2011

Sexy Forum Set (NO SCRAPS!)


What you need:::

Working knowledge of PSP.
I used a tube by Simon Han.  You MUST have a license to use this art! 
The Word Art is from Elegently Wasted
Font used was amienne . I have had it for so long I do not recall where I got it from.
Sparkles of choice

Plug-in: Muras Meister: Copies

Make sure to save often!


Design:::

Use a new image with a white background, I used size 600x250.  You can always resize later.
I used a gradient of black and red, 50 angle, 1 repeat, linear as the bottom layer
select all, float, defloat, new raster layer, selections, modify, selection borders 6, inside, paint black.
paste closeup as new layer.  Use muras meister, copies,star cluster, random
invert, delete, select none, move under frame
Change blend to screen
paste tube and position as desired
Use the word art. I used the gradient on the SE and Y.  On the SE, select all, float, defloat, new raster layer, selections, modify, expand 2, paint white, deselect, move under SE.  Repeat for Y.
Add sparkles if desired
Position as desired.
Add name and copyrights.  Add sparkles or elements as desired.


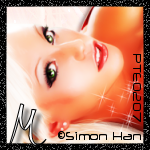
To create the avi...

Use the crop tool.  Size it to 150x150.  Crop to what you would like from the banner.
Copy merged, paste as a new image
select, deselect, float, defloat, selections, modify, selection border 2, new raster layer, fill in black and add noise
Add copyright and name.


Hide background, merge visible, resize if desired and save as a png. 


This tutorial was written on March 13, 2011.

Tuesday, March 1, 2011

Pink Girl (PTU)


What you need:::

Working knowledge of PSP.
I used a tube by Lorenzo Di Mauro.  You MUST have a license to use this art! 
The kit is Happy Girl from Butterfly Kisses Scraps. You can purchase it from Scrappin' Dollars!
Font used was yummah strawberriez from dafont


Plug-in: Alien Skin: Gradient Glow

Make sure to save often!


Design:::

Use a new image with a white background, I used size 600x600.  You can always resize later.
paste the frame6 as a new layer
use your magic wand and click inside, paste paper1 as new layer, selections, modify expand 2, invert, delete, select none, move under frame
paste closeup as new layer.  Erase bottom of legs that are over frame


Time for the elements!!

Choose what you like, however, to match my tag, this is what I used (and resized)::

vine - 60% (dropshadow)
heartscatter1 - drop to lowest layer
rose2 - 30% (duplicate, mirror)
bow3 - 30%
flower2 - 50% & 60% (rotate, 20 right)
jewelrybox - 30%
heartcake - 30%
Sparkle3


Don't forget to add your name and your copyright!  Hide background, merge visible, resize if desired and save as a png. 

I used Gradient Glow around the name to help it stand out.

This tutorial was written on March 1, 2011. The concept of this tutorial are copyrighted.  You may LINK to the tutorial and/or print it out for personal use.  Please do not copy any of it to put online, pass out or re-write without permission.  The image you create from the tutorial is for you to do what you wish except for monetary gains or for merchandising.  Any resemblance to another tutorial is purely coincidental.

Thursday, February 24, 2011

Heaven (PTU)


What you need:::

Working knowledge of PSP.
I used a tube by Legends Art.from PTE  You MUST have a license to use this art! 
The kit is Angels of Heaven from Rebellious Scraps. You can purchase it from The Creativity box
Font used was albermarle swash from 101fonts


Plug-in: Xero: bad dream

Make sure to save often!


Design:::

Use a new image with a white background, I used size 600x600.  You can always resize later.
paste the frame1 as a new layer - resize 70%
use your magic wand and click inside, paste paper1 as a new layer, position, selections, modify expand 5, invert, delete, select none
move under frame
click inside frame again, copy close up and paste as new layer, position as desired, invert, delete, select none
move under frame, duplicate, gaussian blur 6, change blend to overlay, go to original layer and change to luminance legacy
merge two tube layers together
click the inside of the frame yet again, paste the diamond rain as a new layer, invert, delete, select none.  Move under the tube layer


Time for the elements!!


Choose what you like, however, to match my tag, this is what I used (and resized)::

cloud1 - 70% *do not dropshadow*
flowers - 60% & 80% (dropshadow)
embellishment - 60%  (dropshadow)
angel1 - 50% (move under flowers)

Paste your tube, mirror and position.  I used the plug-in xero: bad dream with default settings.  Dropshadow as desired
Paste sparkles and your done!


Don't forget to add your name and your copyright!  Hide background, merge visible, resize if desired and save as a png. 

This tutorial was written on February 24, 2011. The concept of this tutorial are copyrighted.  You may LINK to the tutorial and/or print it out for personal use.  Please do not copy any of it to put online, pass out or re-write without permission.  The image you create from the tutorial is for you to do what you wish except for monetary gains or for merchandising.  Any resemblance to another tutorial is purely coincidental.

Saturday, February 19, 2011

Irish Luck (PTU)


What you need:::

Working knowledge of PSP.
I used a tube by Elias Chatzoudis, from PTE.  You MUST have a license to use this art! 
The kit is Irish Luck from IDGAS. You can purchase it from Scrappin' Dollars!
Font used was erin go braugh from dafont


Make sure to save often!


Design:::

Use a new image with a white background, I used size 600x600.  You can always resize later.
Paste frame2 as a new layer and resize 70%
Use your magic wand to click the inside of the frame
paste paper3 as a new layer and resize 50%
selections, modify, expand 5
invert and delete and select none
move under frame layer
use the magic wand to click the inside of the frame again and paste a closeup as a new layer
Position, invert, delete, select none
duplicate, gaussian blur 6, change blend to overlay and then change original blend to luminance legacy

Time for the elements!!

Choose what you like, however, to match my tag, this is what I used (and resized)::

flower4 - 30% & 60% (dropshadow)
flower6 - 30% & 50% (dropshadow)
flowers - 70% (dropshadow and mirror)
rainbow - 30%
deco2 - 30% (dropshadow and mirror)
sparkle - 70% & 70%

Paste the main tube- resize by 70%
duplicate, gaussian blur 6, change blend to overlay.  dropshadow original layer and merge together


Don't forget to add your name and your copyright!  Hide background, merge visible, resize if desired and save as a png. 

This tutorial was written on February 19, 2011.

Thursday, February 17, 2011

MidNight Dream (PTU)


What you need:::

Working knowledge of PSP.
I used a tube by Dark Yarrow at Dreamscape Imaging.  You MUST have a license to use this art!
The template used was Triple Frame 1 from Designz by lou
Mask used was Vix Mask 423
The kit is from Midnight Dream from Foxy Designz. You can purchase it from The Creativity box!
Font used was petrascript EF by fonts101


Make sure to save often!


Design:::

Use your magic wand to click the inside of the middle frame.
Copy and paste paper 6 as a new layer
selections-modify-expand 4, invert, delete, select none
Move under frame layer
Duplicate layer and use the raster deform tool to angle it to fit under the first frame
repeat for the final frame
Copy and paste paper 5 as a new layer
Use Vix Mask 423, merge group and put to bottom layer
Go to the frame layer again, and use your magic wand to click the middle frame.
Copy and paste the close up.  Position as desired, invert and delete
Change blend to Luminance Legacy
Copy tube and position as desired
duplicate, adjust, gaussian blur 6, blend to overlay
dropshadow first tube layer and merge duplicate to original


Choose what you like, however, to match my tag, this is what I used (and resized)::

leaves2- 65% (dropshadow, raster deform over frame)
lantern- 55% & 80% (dropshadow)
butterfly1- 50% & 50% (dropshadow, duplicate and move)
candle2- 40% (dropshadow)
flower4- 20% & 40% (dropshadow)
flower3- 20% & 40% (dropshadow, position under flower4)


Don't forget to add your name and your copyright!  Hide background, merge visible, resize if desired and save as a png. 

This tutorial was written on February 17, 2011.

Sunday, February 6, 2011

Sweet (PTU)


What you need:::

Working knowledge of PSP.
I used a tube by Pinup Toons at Creative Design Outlet.  You MUST have a license to use this art!
The gorgeous kit is Sweet from Pink Candy Designs. You can purchase it from Scrappin' Dollars!
Mask used was WSL_207 
Font used was rickles by dafont.com


Make sure to save often!


Design:::

Open new with 600x600
Paste paper5 as new layer
Use WSL_207
Merge group
Position as desired or see tag for referance
paste element38 as new layer
Click inside with magic wand
paste paper2, resize 60%
selections, modify expand 3,
invert, delete, select none
move under frame layer
go back to frame layer and click inside
position close up tube as desired, invert
use eraser to erase parts of tube at bottom of frame
select none
go back to frame layer and click inside
position tube as desired, invert
flip tube and position as desired, delete
move to other layer, delete overhanging tube
merge two tube layers together, duplicate, gaussian blur 3, change blend to overlay
change bottom tube layer to luminance legacy

Time for the elements!  Use as desired or use tag as referance:

element11 - 60% & 80% (duplicate, move under frame, dropshadow duplicate)
element26 - 50% (dropshadow, duplicate, mirror, resize 80%)
element5
element34 - 60% & 80% (dropshadow, duplicate, resize 80%)
element4 - move to lowest layer


Don't forget to add your name and your copyright!  Hide background, merge visible, resize if desired and save as a png. 

This tutorial was written on February 6, 2011.

Saturday, February 5, 2011

Pink Skater (PTU)


What you need:::

Working knowledge of PSP.
I used a tube by Keith Garvey at MPT, However, he is switching over to PSP Tubes Emporium .  You MUST have a license to use his art!
The template used was Missy's Template 390 from a Divine Intentionz.    Leave some love if you download! 
The kit is Pink Skater from Toxic Desires. You can purchase it from one of the stores she sells at!
Mask used was WSL_206. Please leave love if you download!
Font used was chicago hood by dafont.com


Make sure to save often!


Design:::

Hide shape1, shape 2
highlight circle left
select all, float, defloat, paste paper3, invert, delete select none
repeat for circle right
delete original layers
highlight rectangle
select all, float, defloat, paste paper12, invert, delete, select none
repeat for rectangle2
go to top and paste paper16
use mask WSL206
merge group and drop to lowest layer
highlight rectangle (top layers)
select all, float, defloat, paste closeup tube, leave just face to show, invert, delete, paste closeup of body, put layer below face, delete, select none.  duplicate face, mirror, merge all down to one
duplicate, adjust, gaussian blur, 2, use overlay blend on duplicate layer, luminace legacy blend for original layer
hide wordart, wordart back and wordart back2
paste tube and position as desired or see my tag for referance.  Duplicate and mirror
(dropshadow as desired)
Now comes the fun- the elements!
Choose what you like, however, to match my tag, this is what I used (and resized)::

doodle1- 50% (duplicate & mirror)
teddy bear - 40% & 60% (duplicate & mirror)
lips2 - 60% (duplicate, mirror, place)
skull1 - 60% (select all, float, defloat, new raster layer, selections, modify expand 3, color, add noise, drop down under skull, select none, merge)
tape - 30%


Don't forget to add your name and your copyright!  Hide background, merge visible, resize if desired and save as a  jpg or a png. 

This tutorial was written on February 5, 2011.